 |
| Photoshop Tutorial : Double Exposure |
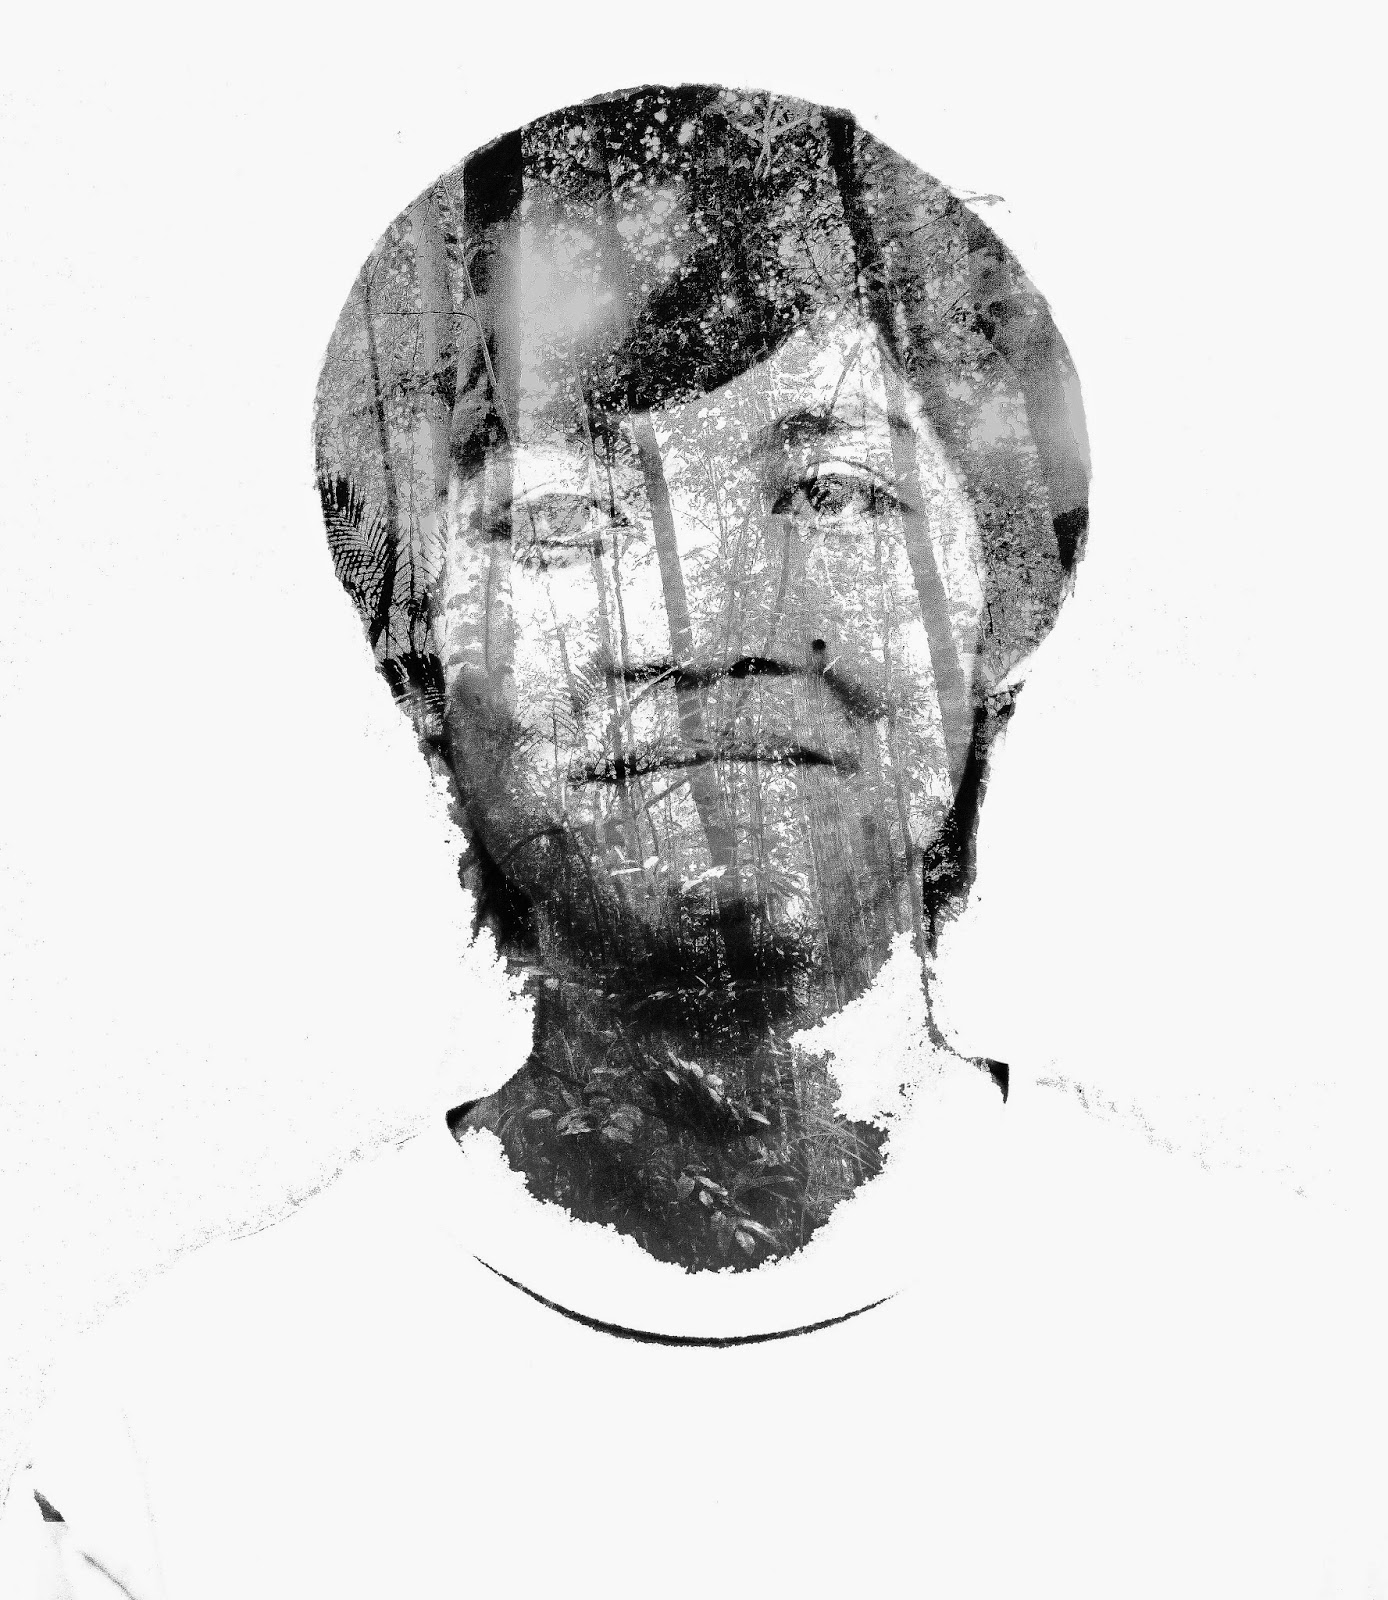
Today I want to teach you guys how to make double exposure image using photoshop.(Photoshop Tutorial : Double Exposure)
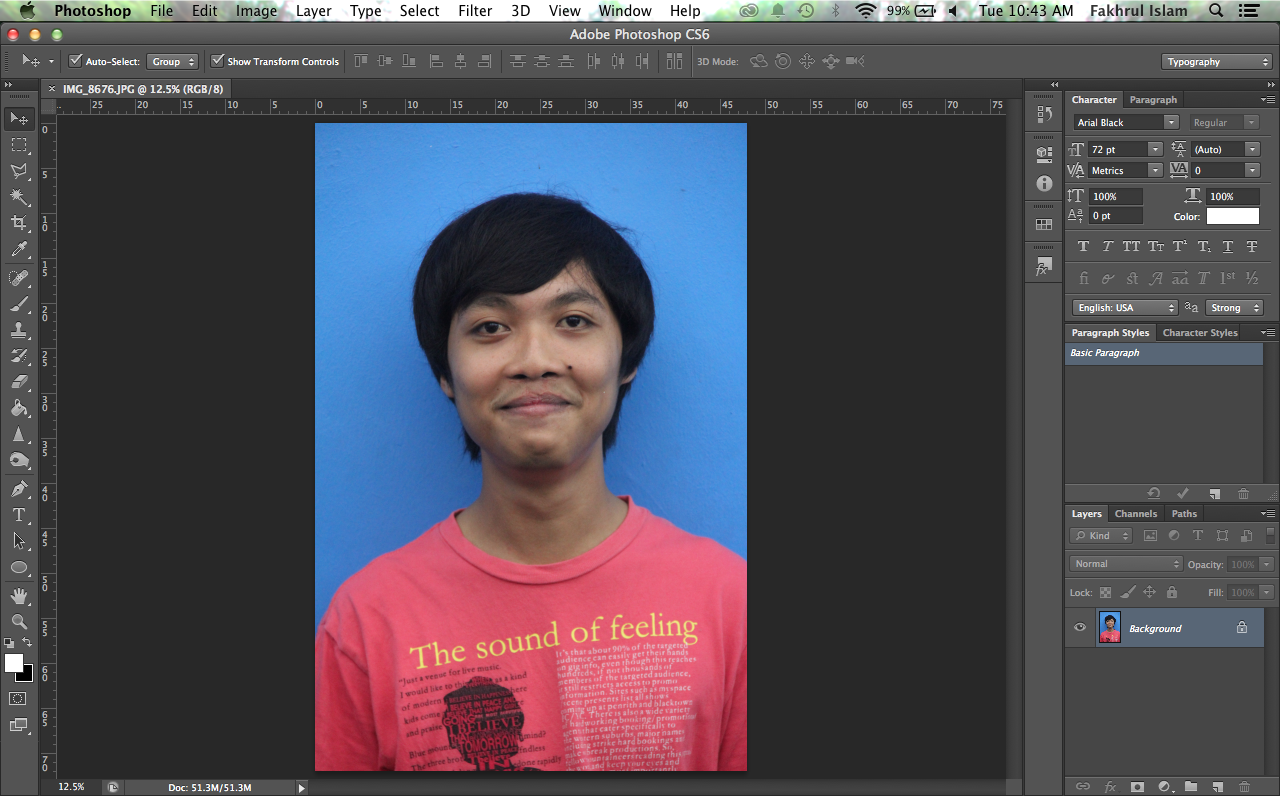
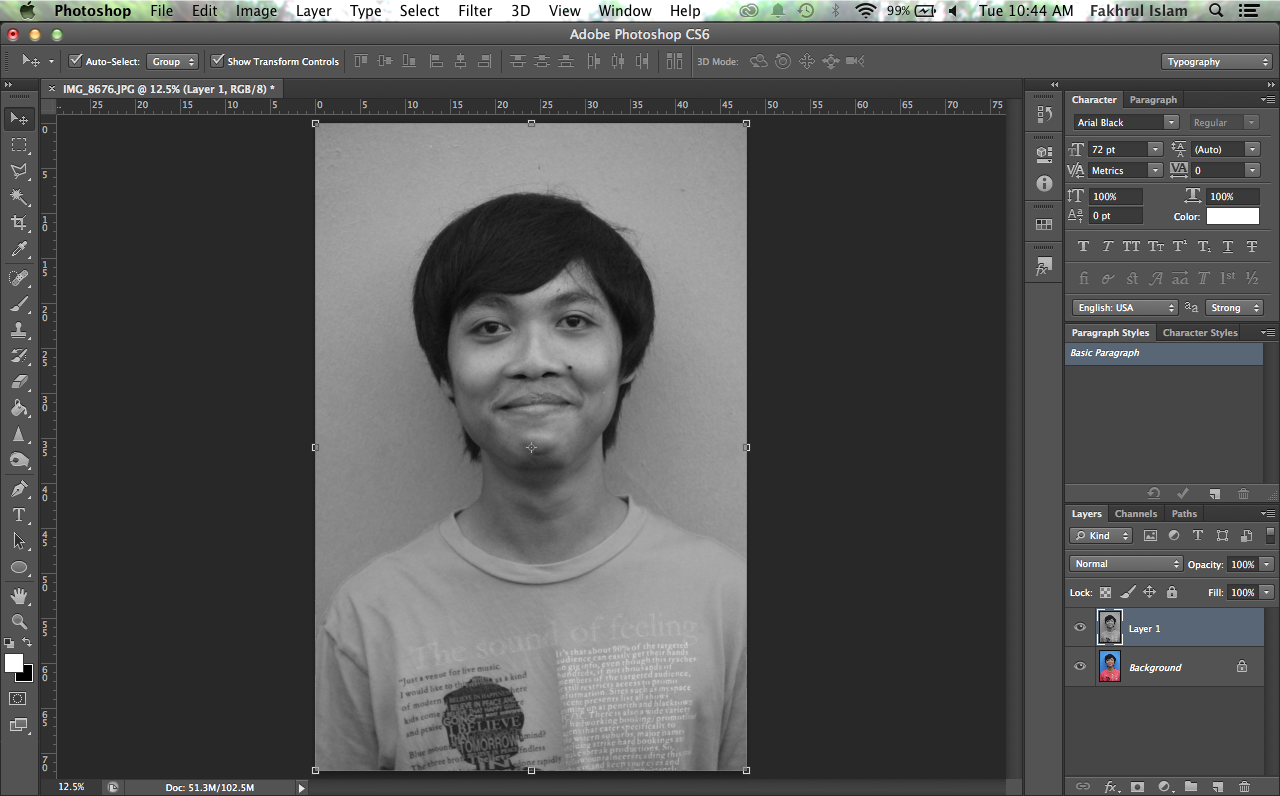
First choose your image and drag into photoshop. than use your keyboard short key (command + J) or (Ctrl + J) to duplicate the image. after duplicate the image use (command + shift + U) or (Ctrl + shift + U) to desaturate the image.
 |
| Photoshop Tutorial : Double Exposure |
 |
| Photoshop Tutorial : Double Exposure |
use your keyboard short key again (command + J) or (Ctrl + J) to duplicate the image. than set the blending mode to "OVERLAY" for the layer as shown below and also for the opacity. Than double click the image at the layer side and chose to flatten the image.
 |
| Photoshop Tutorial : Double Exposure |
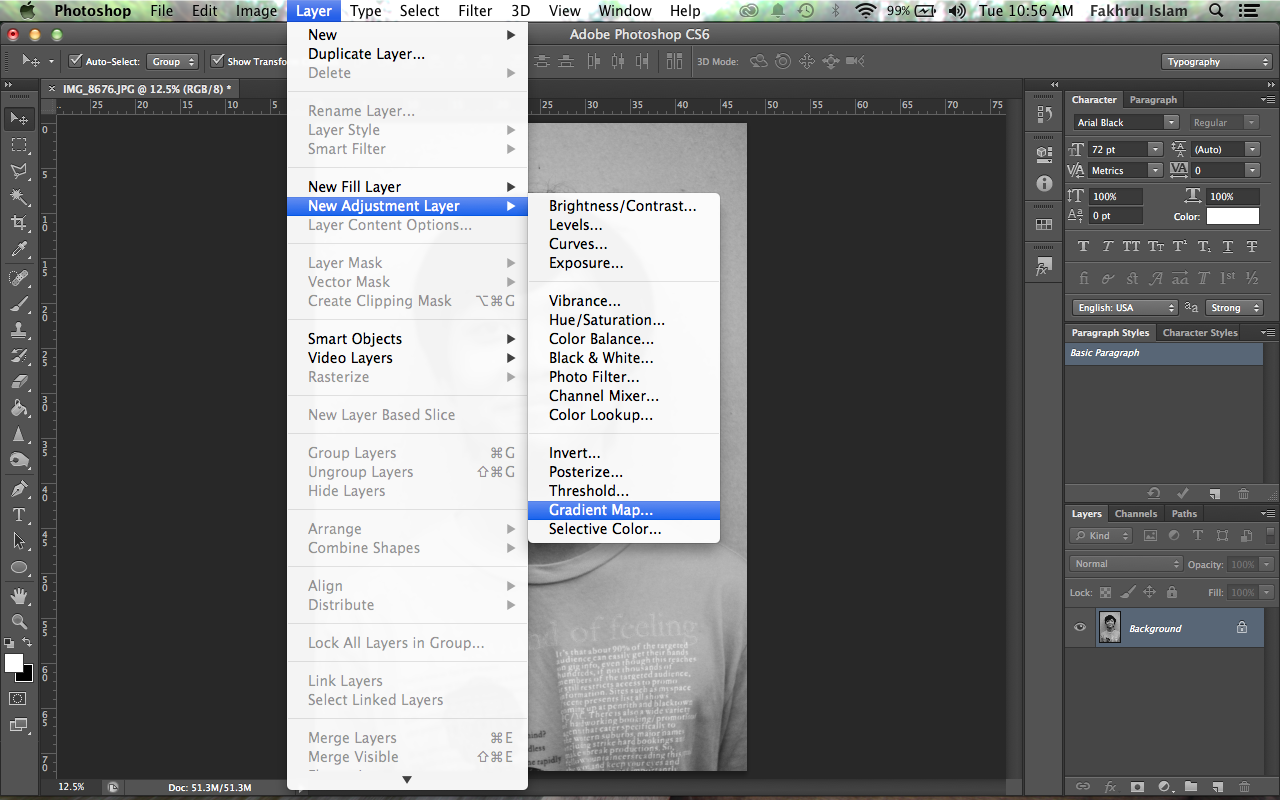
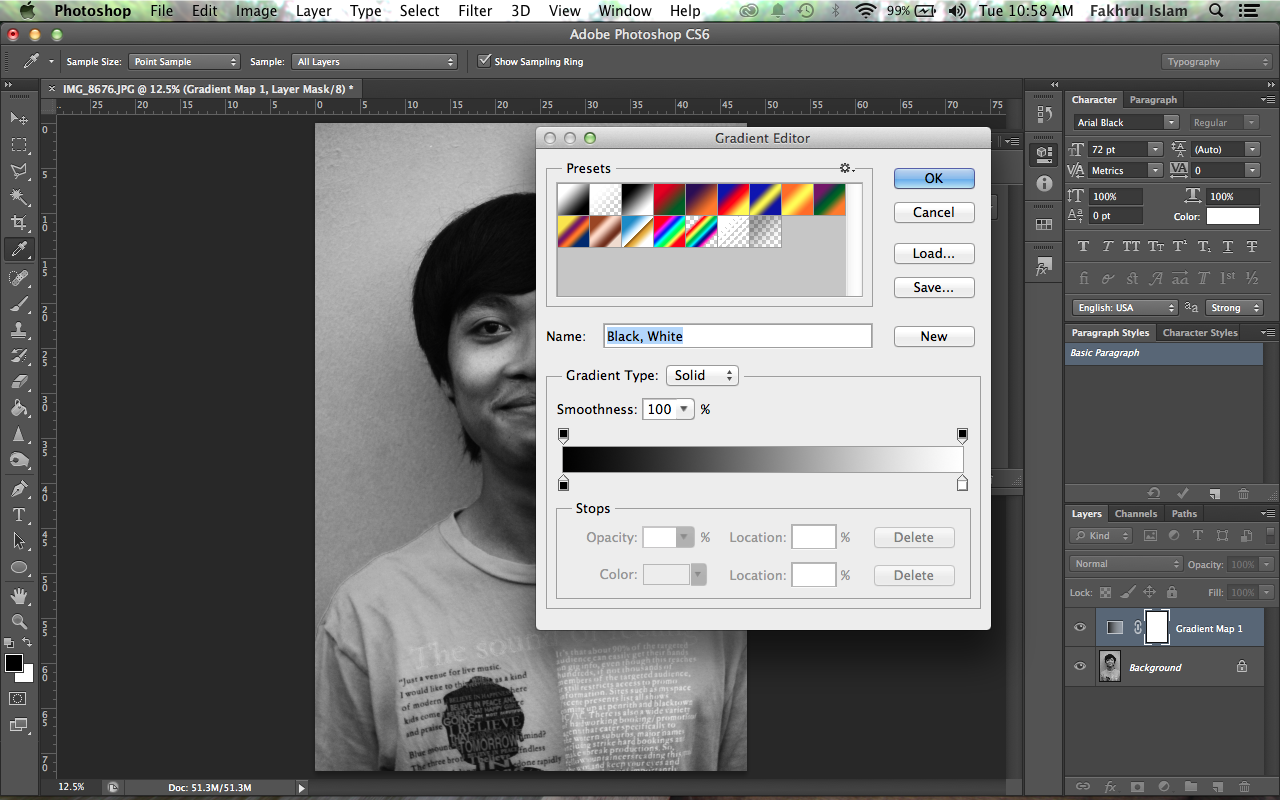
After that go to layer at the top bar, new adjustment layer and choose the gradient map then click okay choose for the black to white gradient. The gradient map layer choose the blending mode for the layer to overlay and reduce the opacity to 50%.
 |
| Photoshop Tutorial : Double Exposure |
 |
| Photoshop Tutorial : Double Exposure |
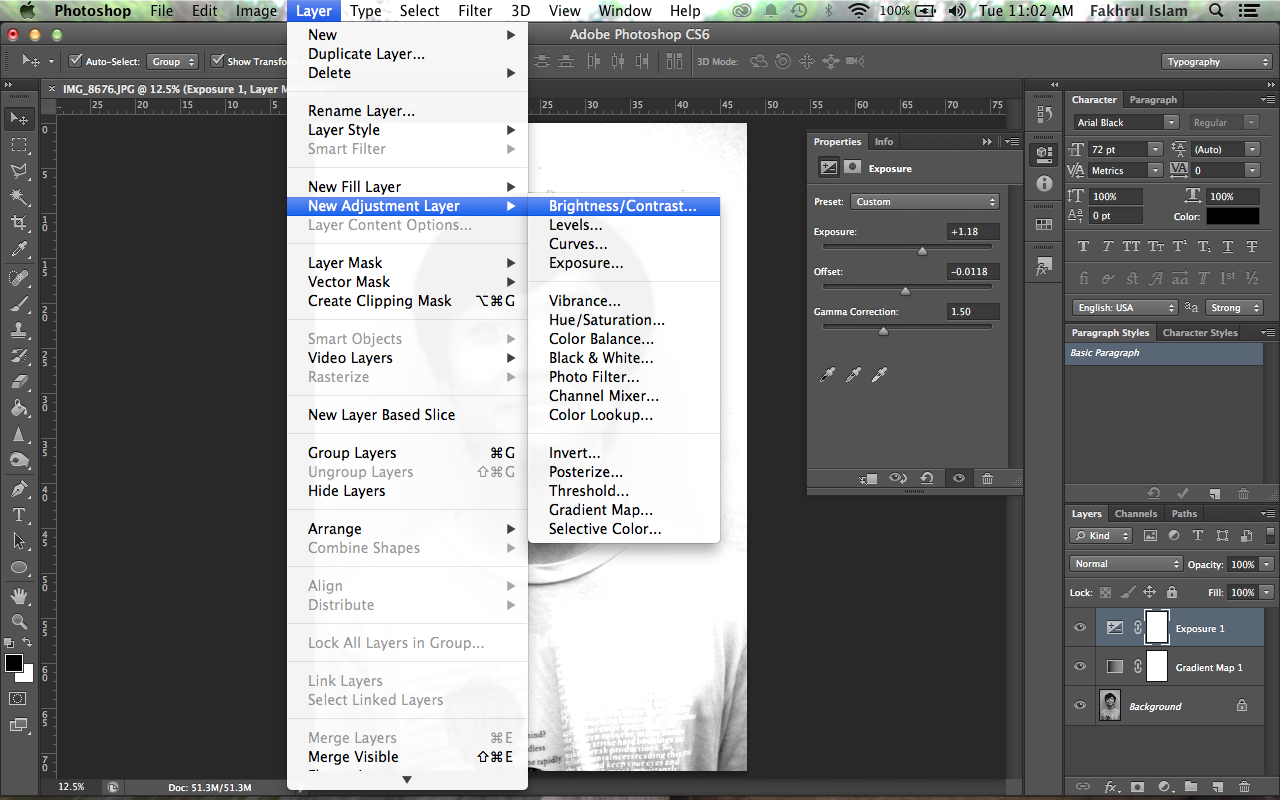
After that go to layer at the top bar, new adjustment layer and choose the exposure then click okay. Try to play with the exposure , offset, and gamma bar to make it high key contrast.
 |
| Photoshop Tutorial : Double Exposure |
After that go to layer at the top bar, new adjustment layer and choose the brightness and contrast then click okay. Try to play with the brightness, and contrast bar to make it high key contrast.
 |
| Photoshop Tutorial : Double Exposure |
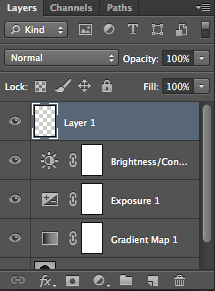
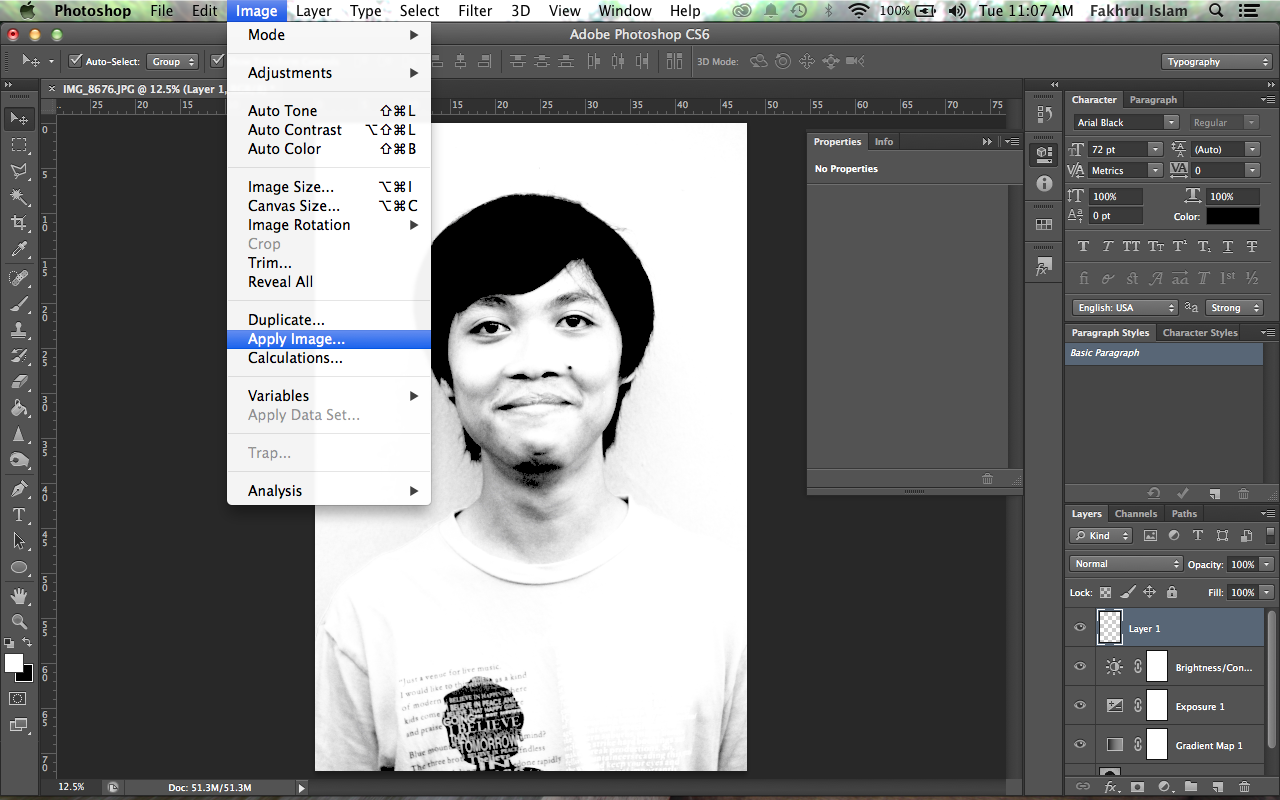
Then create new blank layer, than go to image at the top bar, select the apply image.
 |
| Photoshop Tutorial : Double Exposure |
 |
| Photoshop Tutorial : Double Exposure |
After that you need to crop your image into your shape. You can choose magnetic tool, either pen tool will work better. I used the magnetic tool because want to work faster. hahaha. Than crop into shape your body. You just need your body shape only and remove the background like this. hehe
 |
| Photoshop Tutorial : Double Exposure |
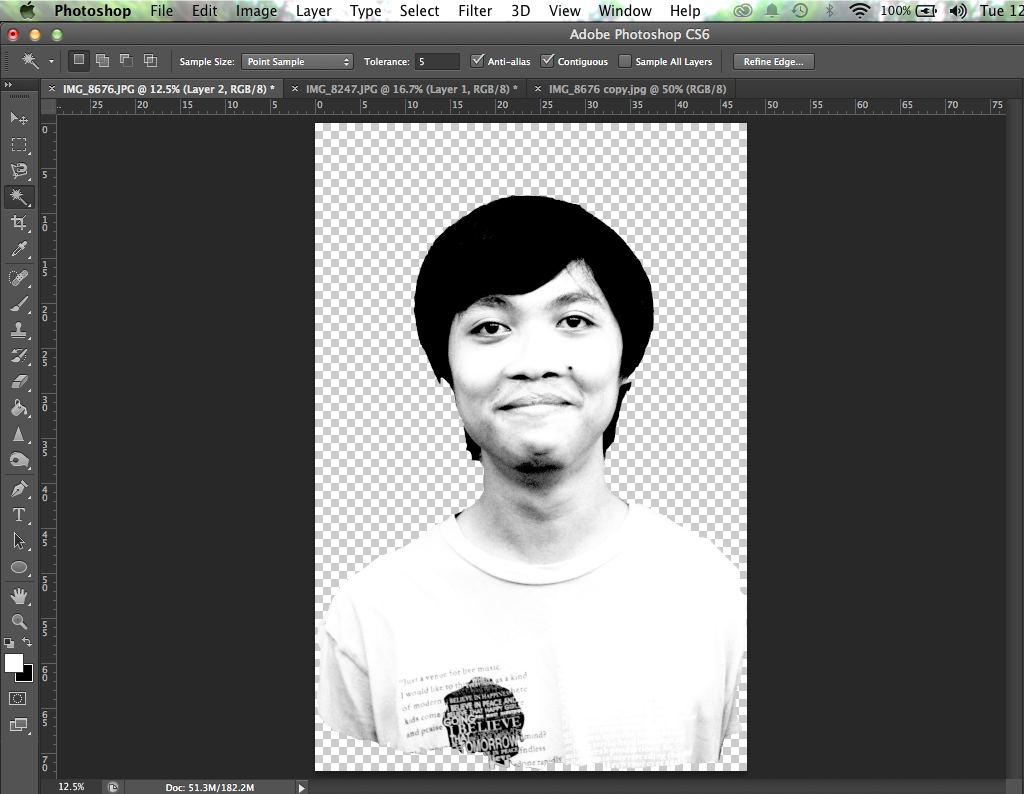 |
| Photoshop Tutorial : Double Exposure |
Than just choose any image to blend with your body shape like this .hehe.
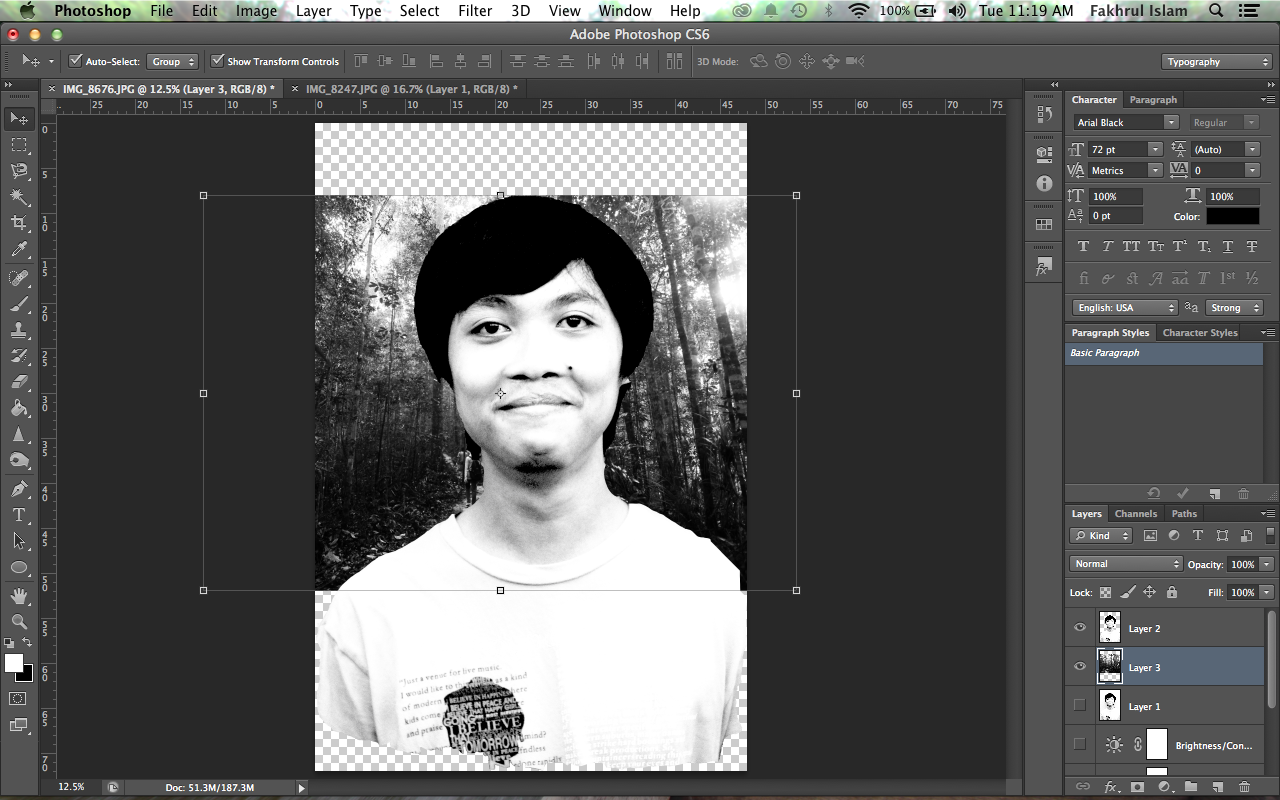 |
| Photoshop Tutorial : Double Exposure |
 |
| Photoshop Tutorial : Double Exposure |
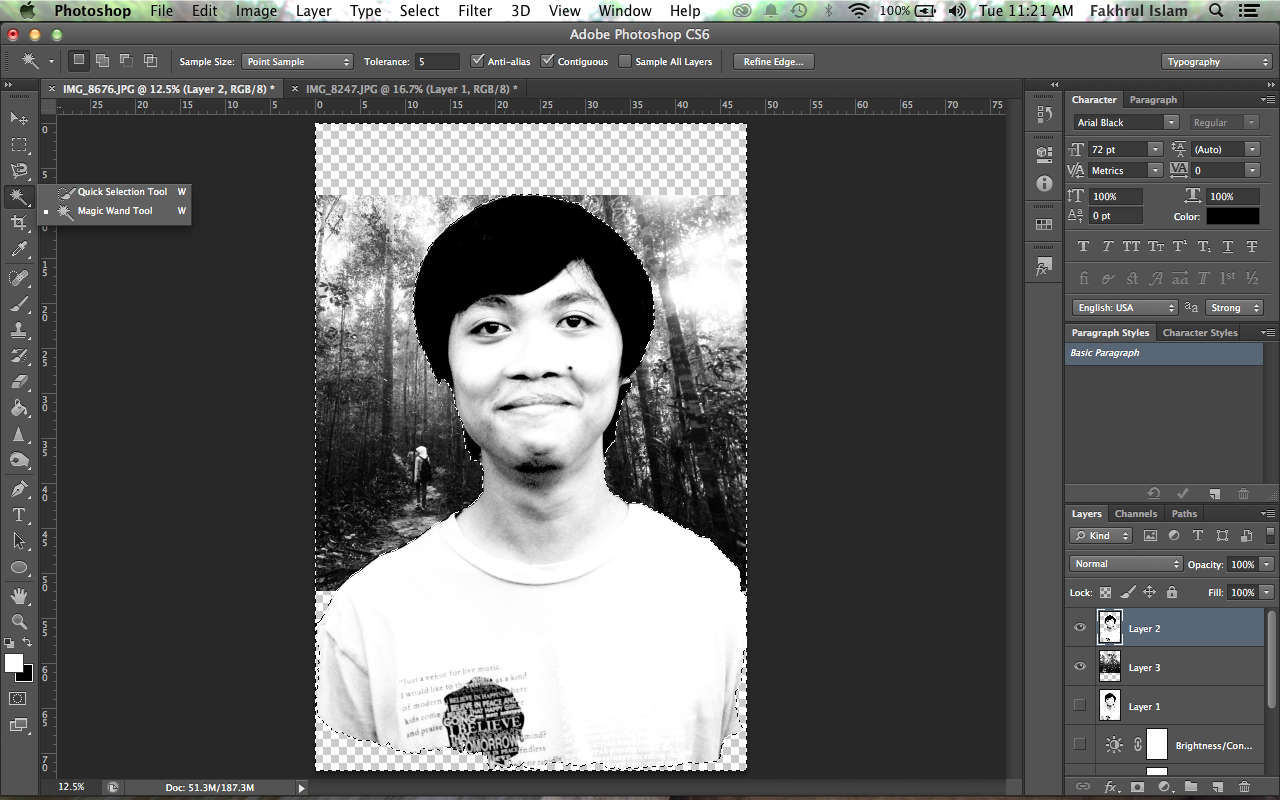
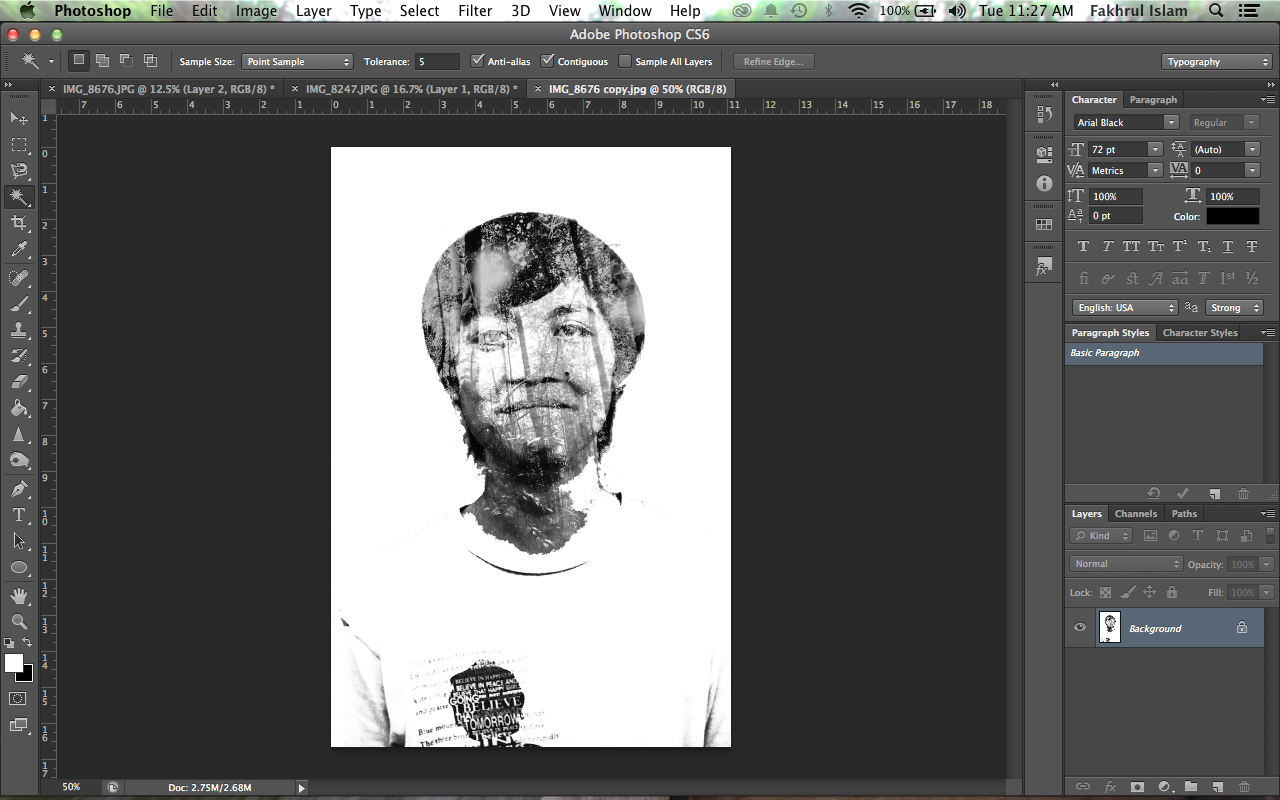
Then use magic wand tool at the left bar and click at the body image I mean at the free side like I shown above. After it appear like above, go to the layer side down there click the image background i mean the forest like my image then click delete button so this will remove the part you dont want, may be a little bit complicated here to explain.huhu
 |
| Photoshop Tutorial : Double Exposure |
tadaaa,will become like photo above.
 |
| Photoshop Tutorial : Double Exposure |
Then set the blending mode for the layer ( your face ) "OVERLAY" as shown above and also for the opacity. So now you already can see the background image.
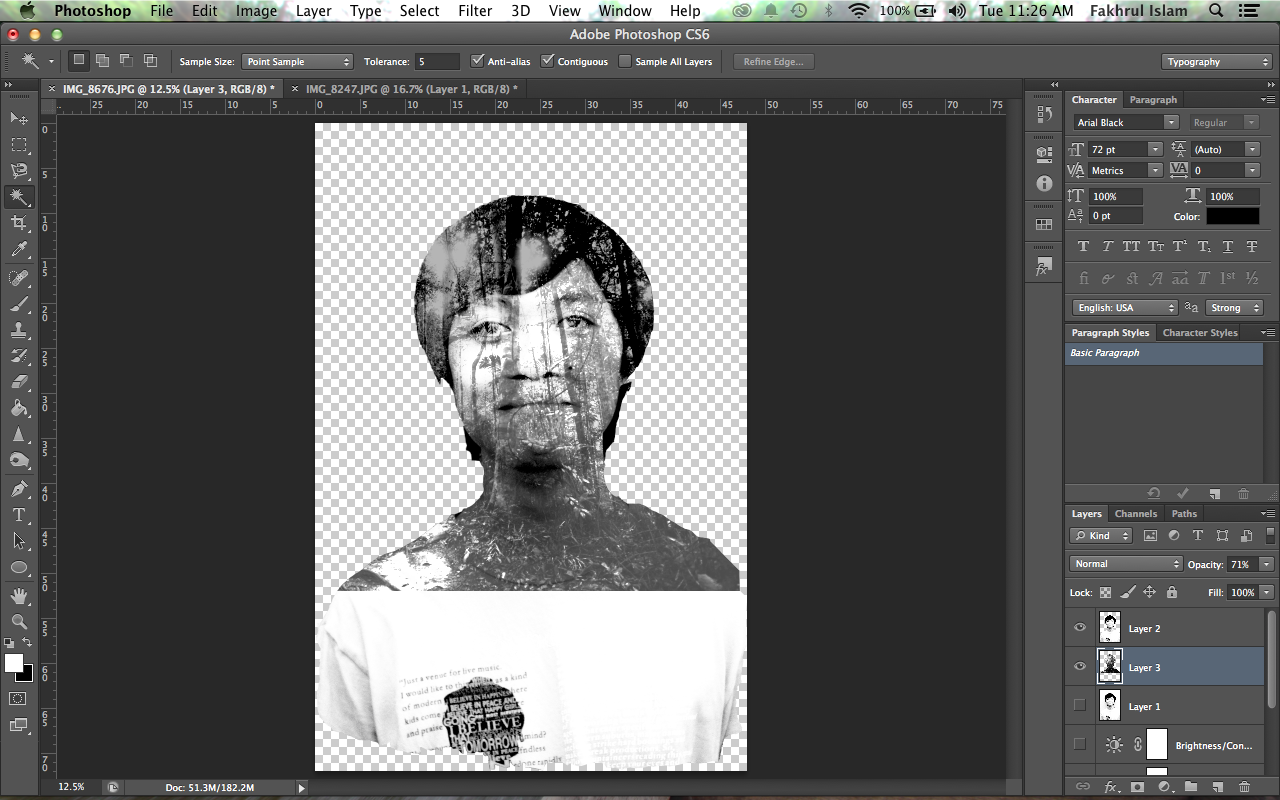 |
| Photoshop Tutorial : Double Exposure |
Below is the final result,you need to use eraser tool to erase the part you dont want. Thank you for read my 1st tutorial,I'll improve this for the next tutorial.
 |
| Photoshop Tutorial : Double Exposure |
Below is the video that I was follow, I was combine the technique with the first video with the second video. Because I want to make it into black and white.
MAKE BLACK & WHITE IMAGE (credit video to
SimplyGFXStudio)
MAKE DOUBLE EXPOSURE IMAGE (Credit Video to
Alex Wise)


ehhh....macam kenal.... tapi dimana ya???? tak Belum.. kat GOpeng... ahaksss
ReplyDeleteLah, En.Sharil!!! hehe rinduu,haha sy lah yg pergi belum haritu, en.shahril apa habaq,hehe
Delete